
The way websites are designed and built has changed a lot in recent years. Webflow played a big part in that shift. The platform makes website creation possible without writing code. It has become a go-to tool for designers, entrepreneurs and tech enthusiasts who want to bring their ideas to life without getting lost in the complexity of code.
This Webflow beginner's guide has 2 goals. The first is to introduce Webflow to people who have not yet started building websites, and to show how simple and powerful it is. The second is to make the tool accessible to beginners, even with no programming skills at all. With clear, step-by-step explanations, we walk through the basics and the interface of Webflow so you can start your own web project.

What is Webflow?
What is Webflow used for?
Webflow makes website creation accessible to as many people as possible. Personal blog, company showcase site or complex online store, Webflow lets you build it intuitively and on your own. It is made for people who want to bring their web design ideas to life without hitting the technical barriers of traditional development.
Why choose Webflow?
Webflow stands out from other website builders thanks to its flexibility and power. It lets anyone create custom websites without writing a single line of code. Where traditional site builders impose their limits, Webflow gives you full control over your site's design and features, in line with modern web standards. For a blog, a portfolio or an online store, Webflow gives you every tool you need to build your project without compromise.
The main advantages of Webflow
- Design without code. Webflow frees your creativity and lets you build any layout or animation.
- Responsive design. Simple visual tools let you create a site that adapts to every screen, for a good user experience on each device.
- SEO optimization. Webflow goes beyond looks. It includes advanced SEO features to improve your site's rankings.
- High-performance hosting. Hosting is fast, secure and reliable, which keeps your site available at all times.
Mastering Webflow, where to start?
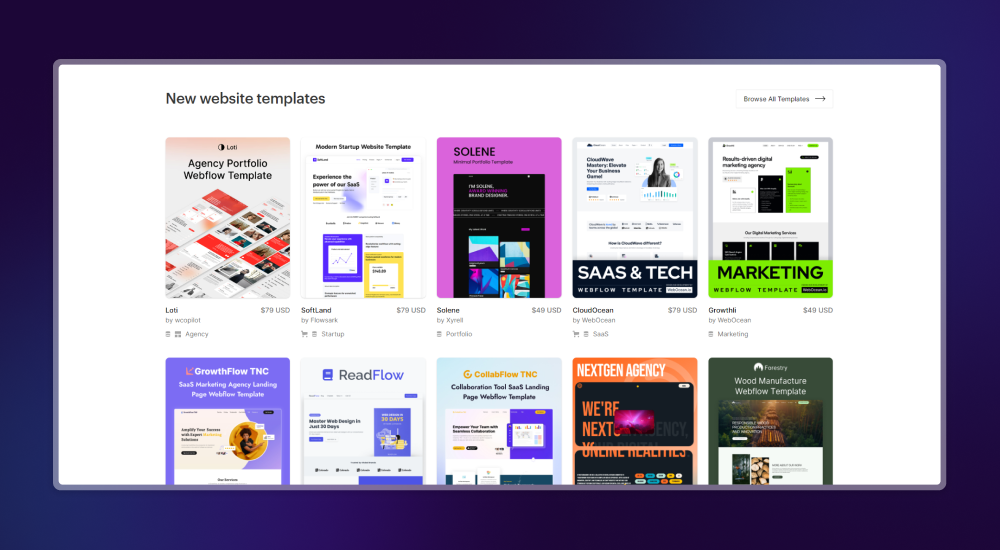
- Choose your starting point. Explore the template library or start from a blank page to bring your project to life.
- Discover the Webflow Designer. This creative space lets you add, edit and style elements, add animations and adjust the design for each device.
- Use the Webflow CMS. It makes it easy to manage your site's dynamic content, whether it is a blog, a store or a portfolio.
- Publish. Once you are happy with the result, you put your site online on the domain of your choice directly from Webflow.
Understanding the basics of Webflow
Webflow relies on HTML elements, CSS classes and JavaScript interactions, and turns these concepts into a visual interface that is easy to use. Here is how the tool simplifies them:
- HTML elements. In Webflow, HTML elements are shown visually. You drag and drop sections, containers, divs and other elements directly onto the page. Each selected element displays its properties (text, images, links) in a side panel that is simple to use.
- CSS classes. You style elements by creating CSS classes in the interface. After selecting an element, you apply styles such as color, size, margin or padding from the Style panel. These classes can be reused on other elements to keep the design consistent.
- JavaScript interactions. Webflow lets you create animations and interactions without writing JavaScript. In the Interactions interface, you set triggers, such as hover or click, and attach animations to them (movements, rotations, style transitions).
Navigating the Webflow interface
The Webflow interface is designed to be intuitive. It gives simple access to the Dashboard, the Editor and the Designer. From the start, you are guided through creating a new project and choosing a template that fits your needs. This step-by-step approach helps you get up to speed quickly, even with little experience.
- Dashboard. This is the starting point to access your projects, account settings and learning resources. You create a new project here or select an existing one to edit.
- Editor. Once inside a project, the Editor lets you add and edit content (text, images) directly on the page, without touching the design.
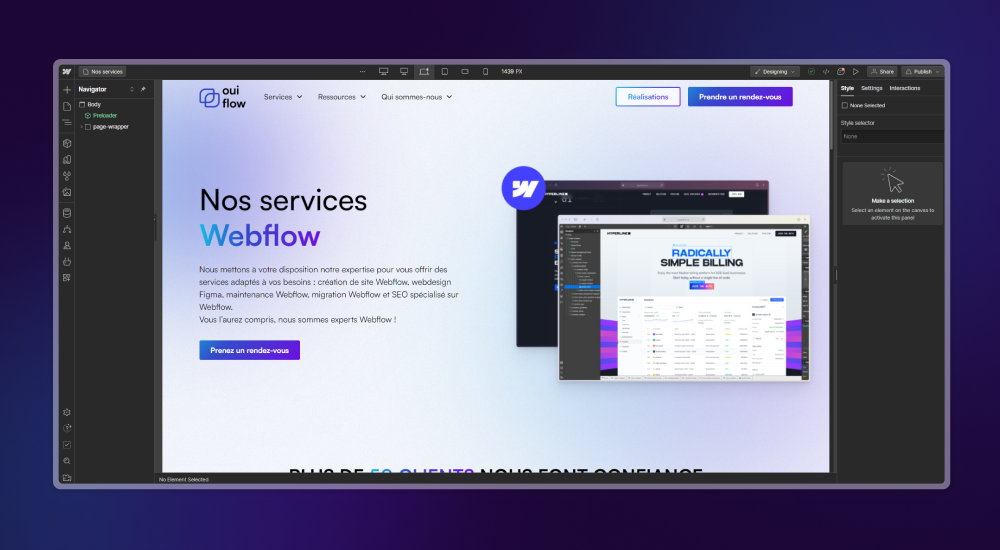
- Designer. This is the main tool to build and style your site. It is made up of a toolbar at the top, a central canvas where you build the page, a Style panel on the right to style selected elements and an Assets manager for your images and other files.
First steps with the Webflow Designer
The Webflow Designer is where your site takes shape. It is made up of the toolbar, the canvas, the Style panel and the Assets manager. To get started, follow these steps:
- Choose a template or start from scratch. Webflow offers many templates you can customize. If you prefer to start from scratch, select a blank page.
- Explore the toolbar. Get familiar with the available tools, such as adding elements, pages, symbols and interactions.
- Add and style elements. Use drag and drop to add elements to your page. Select an element to open the Style panel and apply CSS styles to it.
- Preview your design. Preview mode shows how your site will look on different devices.
These steps teach you how to add, edit and style elements to build your first page.
Using the Webflow CMS
The Webflow content management system (CMS) is a powerful tool to create and manage collections of content, such as blog posts, portfolios or product catalogs.
To manage dynamic content with the Webflow CMS, proceed as follows:
- Create collections. A collection is a content type, such as blog posts or products. Define the fields of each collection based on the content it will hold.
- Add content. Fill your collections with dynamic content, which you can then link to page elements in the Designer.
- Link content to design elements. Use Collection Lists and Collection Items to display dynamic content on your site.
Publishing your Webflow site
Once your site is ready, Webflow makes it simple to put it online. To publish your site, follow these steps:
- Test your site. Use Preview mode to check interactions and how the site displays on every screen.
- Set up the domain. Connect your custom domain in the project settings or use a Webflow subdomain.
- Publish. Click the "Publish" button to put your site online. You can publish to the Webflow domain or to your custom domain.
Webflow resources and community
To support your learning, Webflow offers many resources, including Webflow University, forums and social media groups. Joining the Webflow community lets you get help, share your experience and keep improving.
To learn faster and solve your problems, rely on these resources:
- Webflow University. A complete resource with video tutorials, courses and guides.
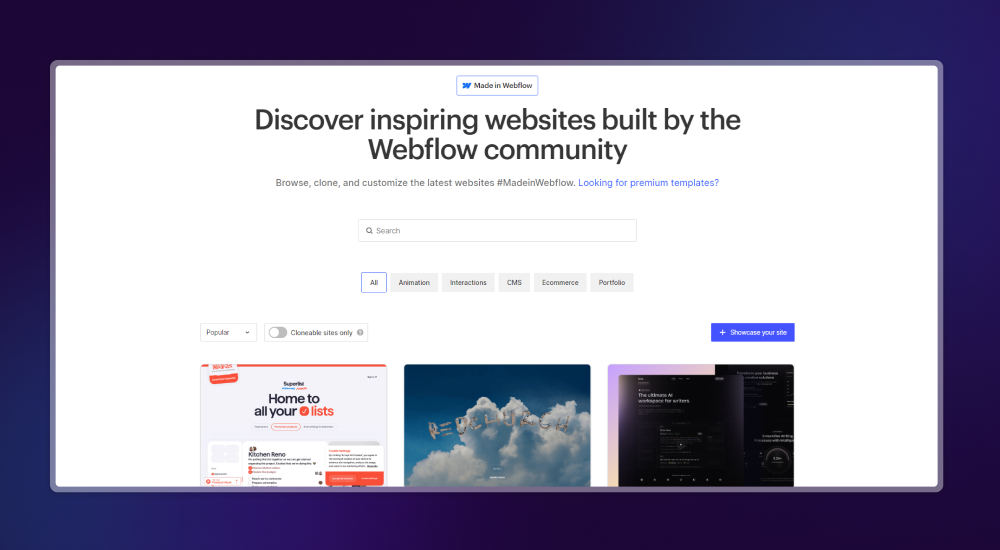
- Made in Webflow. A space that gathers sites built with Webflow.
- Social media groups. Facebook or LinkedIn groups dedicated to Webflow to connect with other users.
Tips to make progress with Webflow
- Start small. Get familiar with Webflow's tools gradually through simple projects.
- Explore Webflow University. It is a valuable resource to learn Webflow, from the basics to advanced techniques.
- Animate your site. Use interactions to make your site more lively, starting with simple animations.
- Think mobile. Check that your site displays perfectly on mobile with Webflow's responsive design tools.
Get started on Webflow
This guide introduced Webflow and the basics you need to create unique, custom websites. With Webflow, web design becomes accessible, creative and rewarding. Experiment and explore everything the tool allows. Start your web project and see how far your creativity takes you.