
Introduction
Running a Webflow site quickly gets technical. You need to track the forms your customers and prospects submit, publish new blog posts and make regular updates. You also often need to check and sync information with your other apps, which makes management even harder. With Zapier and its automated workflows, called Zaps, you simplify these processes, save time and manage your Webflow site better. In this article, we give you a step-by-step guide to integrate Zapier with Webflow.
What is Zapier?
Zapier is a tool that connects Webflow to many apps. It also automates a number of tasks, without coding, and makes you more efficient.
Zapier links your apps through automations called Zaps. A Zap is made up of 2 main elements:
- A trigger. This is the starting event, such as receiving an email or a form being submitted on a Webflow site.
- An action. This is the task that runs automatically after the trigger, such as adding a contact to a CRM or sending a Slack notification.

Why integrate Zapier with Webflow?
Integrating Zapier with Webflow brings several benefits:
- Automating repetitive tasks
You spend less time on manual tasks like recording leads or updating databases. - A better user experience
By automating certain actions, such as sending an email after a sign-up or updating dynamic content, you give your users a smooth journey. - Bringing your tools together
Zapier connects Webflow to thousands of apps. You bring your everyday tools into a single ecosystem. - Higher productivity
Without duplicate processes, your teams focus on high-value tasks.
Want to integrate a third-party app like HubSpot? Watch our video tutorial.
Prerequisites for the integration
Before you start, make sure you have the following:
- An active Webflow account
Go to your Webflow dashboard. You will need your site and form credentials. - A Zapier account
Sign up for free on Zapier to create and manage your automations, the Zaps. - A clear goal
Identify the process to automate, such as sending Webflow form data to a Google Sheets spreadsheet. - Access to third-party apps
Make sure the tools you want to connect to Webflow (Slack, Mailchimp or Google Sheets, for example) are available and set up.
A step-by-step guide to integrate Zapier with Webflow
Step 1, connect Webflow to Zapier
- Log in to your Zapier account.
- Click the "Create Zap" button in the Zapier dashboard.
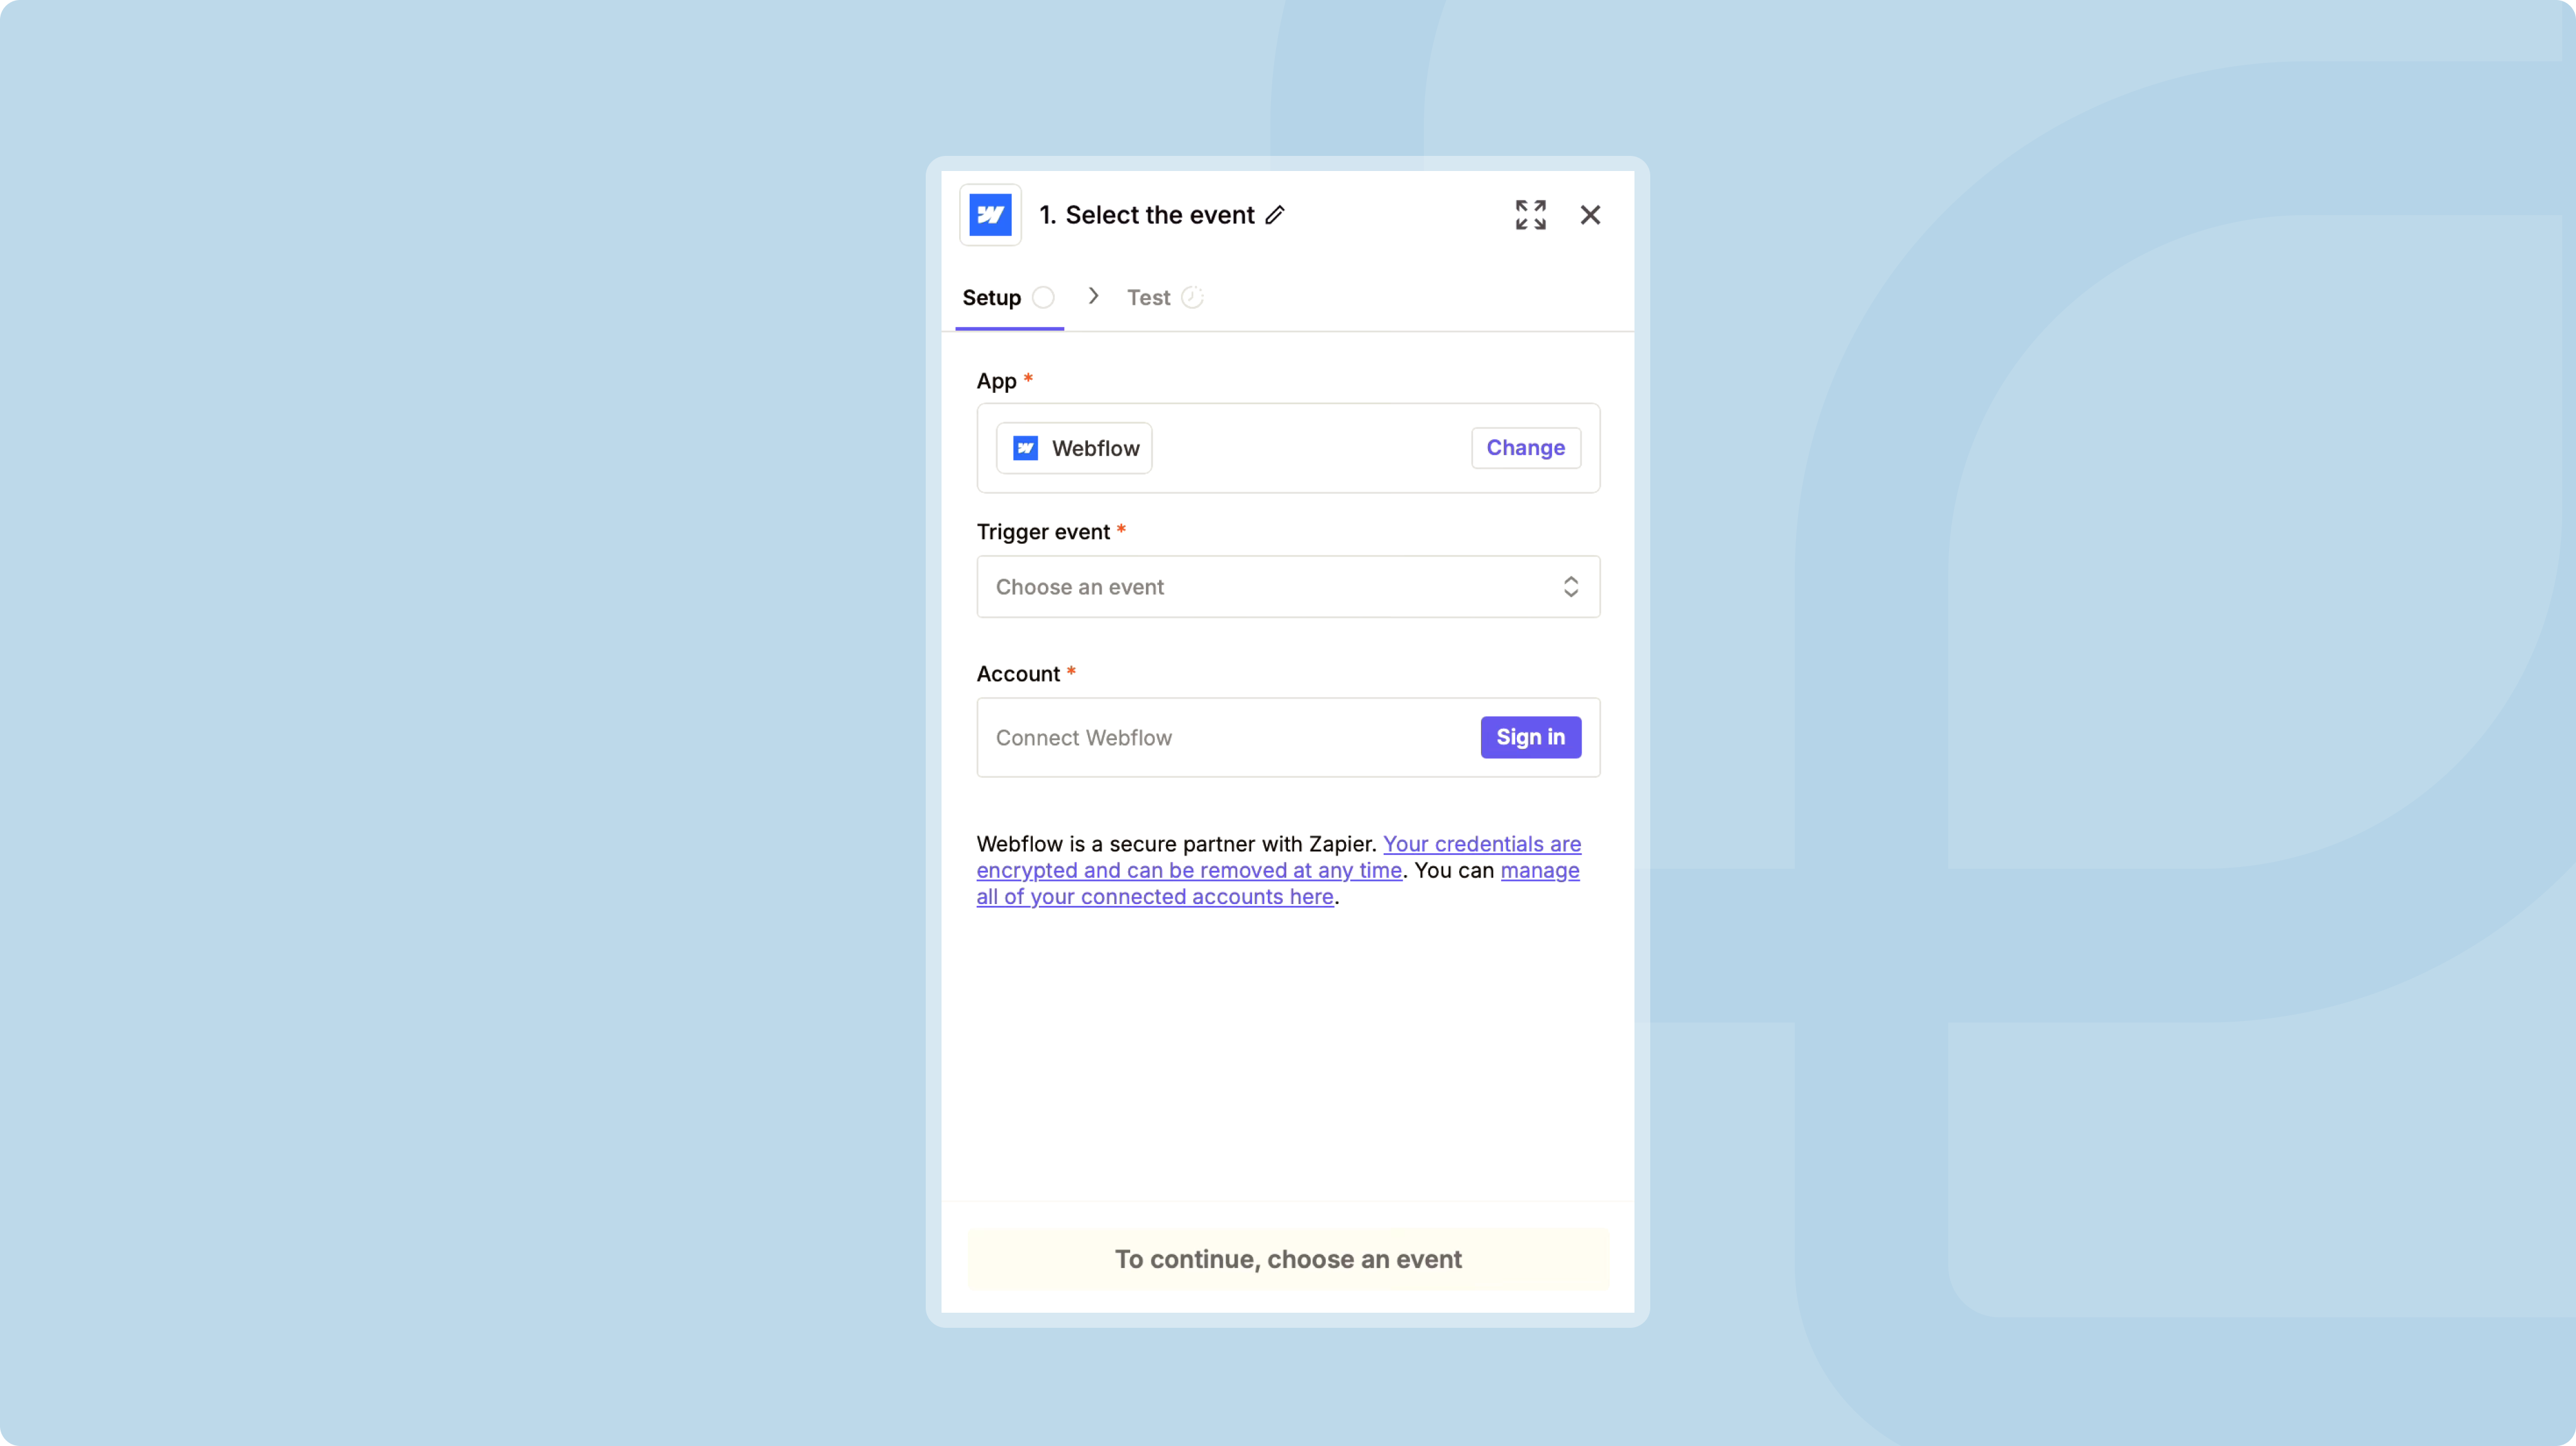
- In the "Trigger" section, search for Webflow and select it.
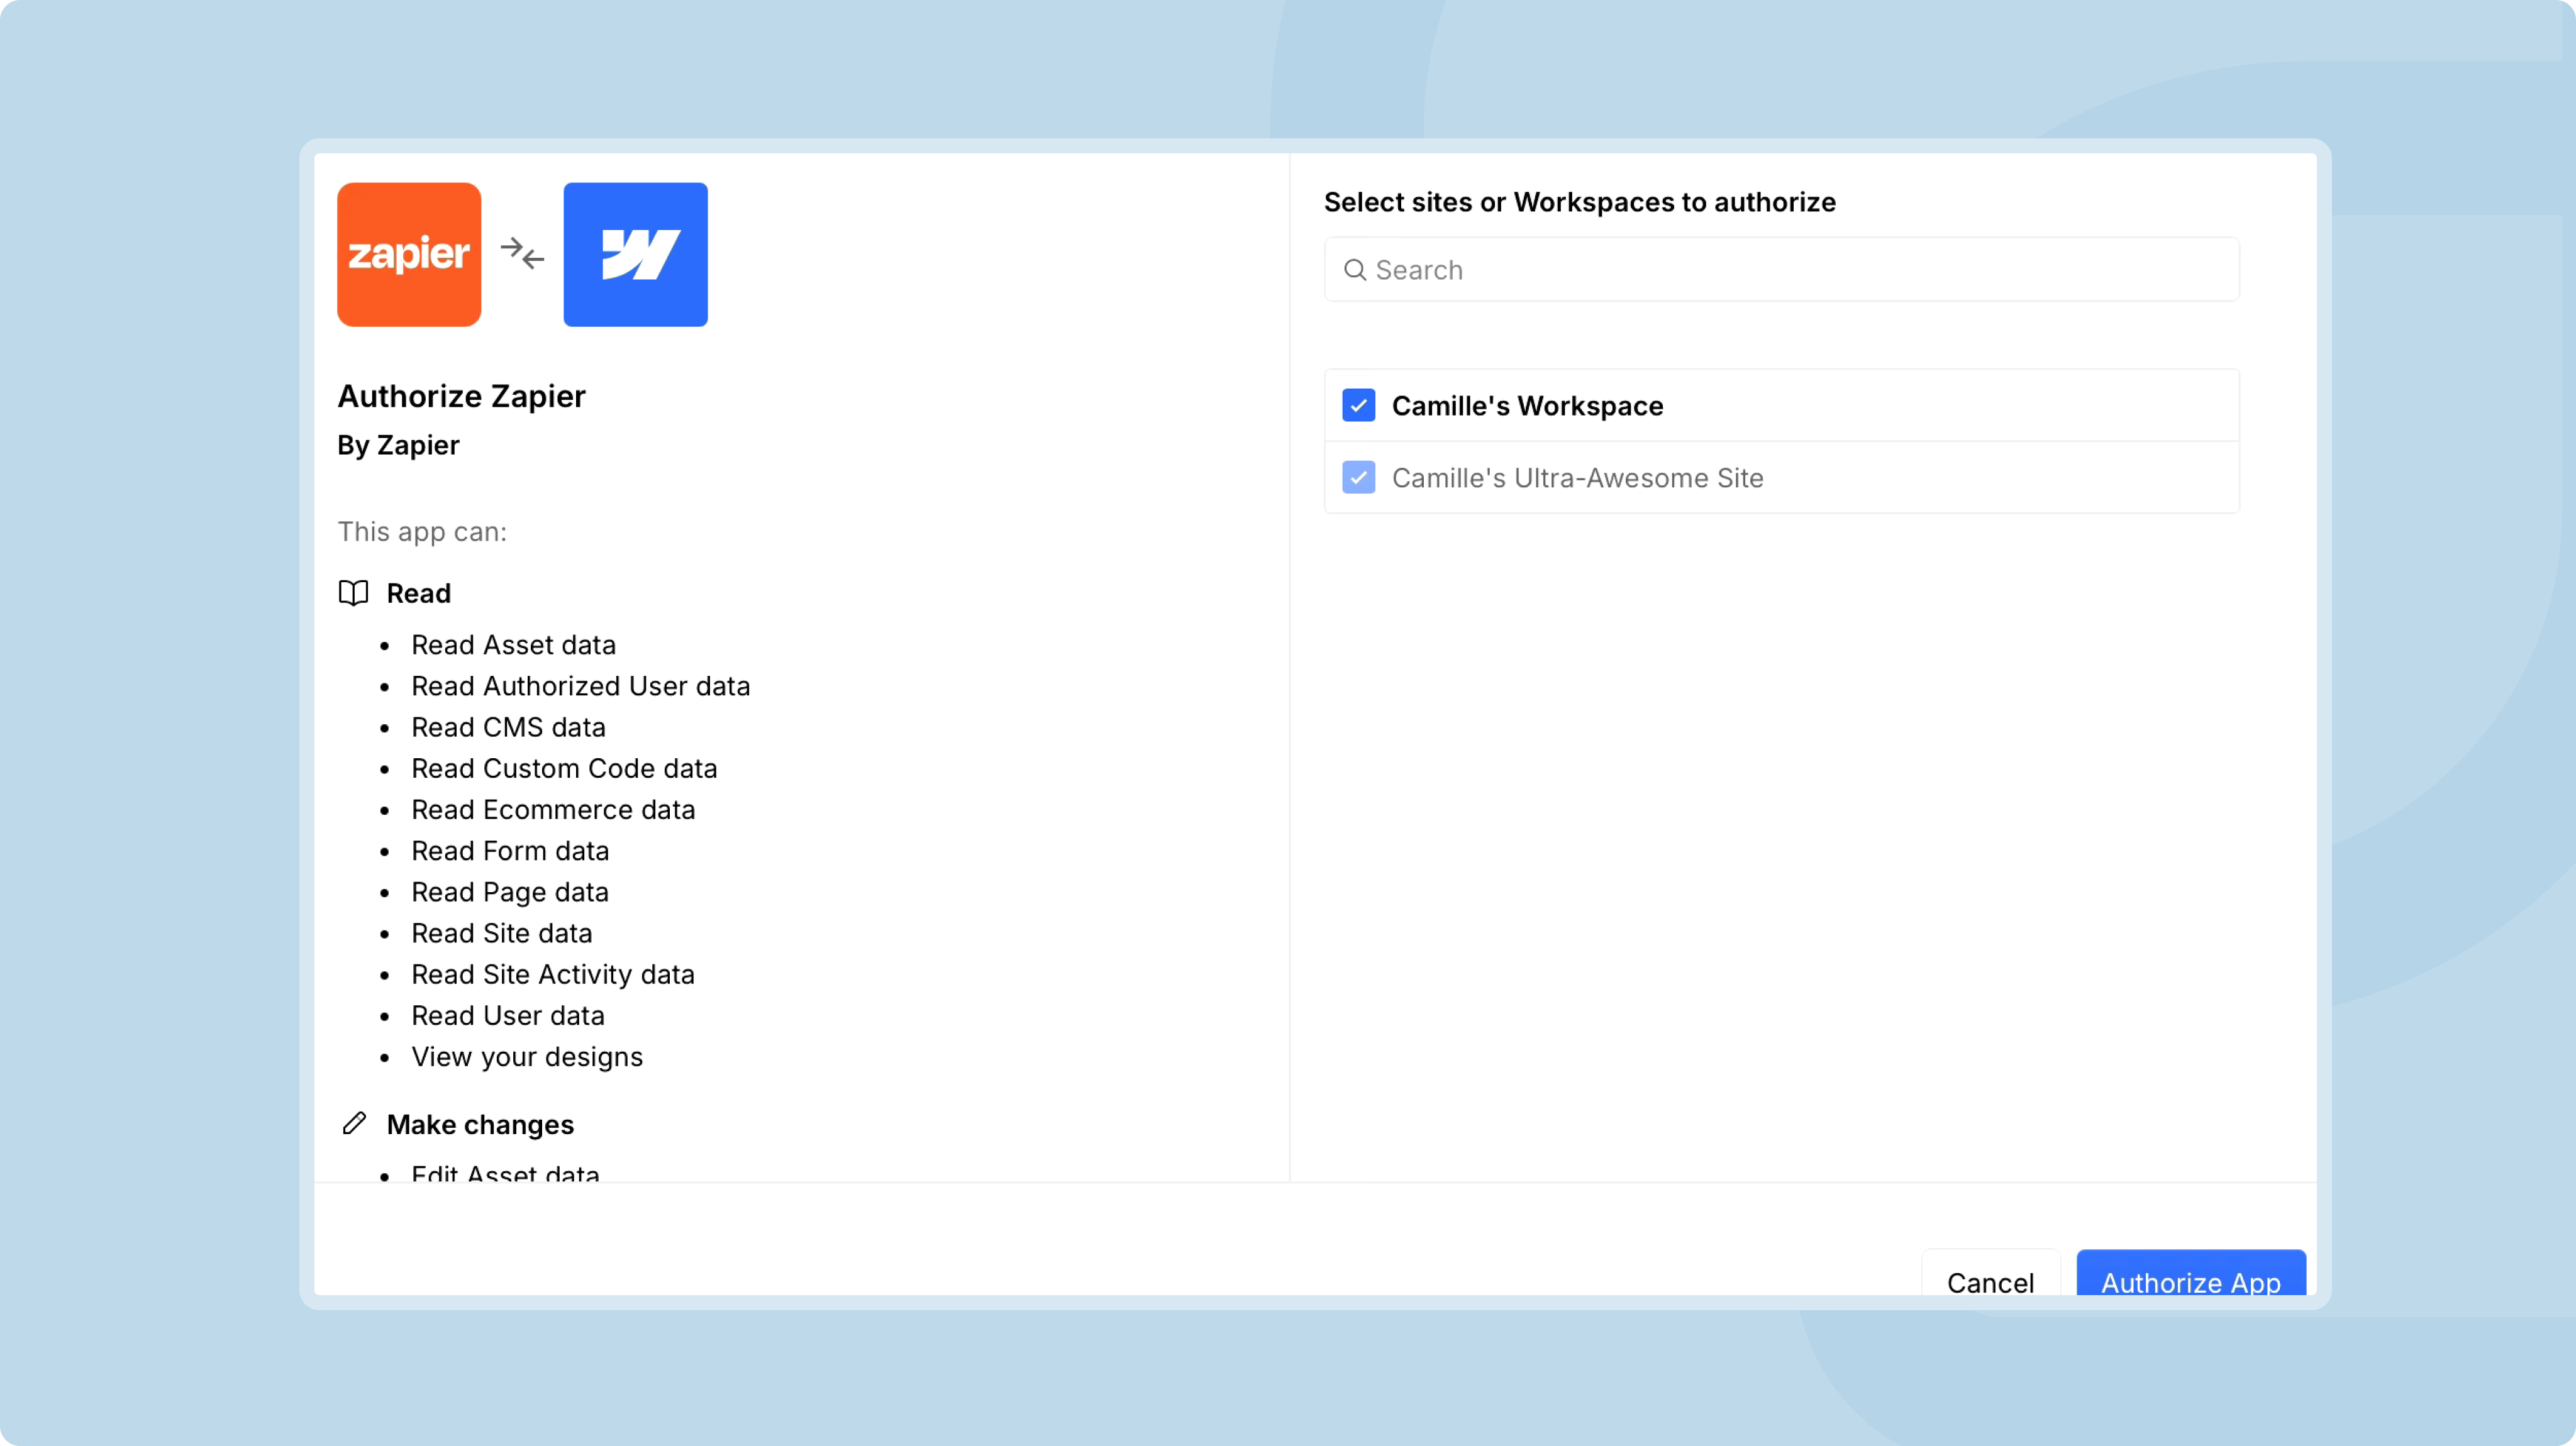
- Connect your Webflow account to Zapier by clicking "Connect a new account".
- Authorize Zapier to access your Webflow projects.
Step 2, set up the trigger event
- Once Webflow is connected, choose a trigger event. For example, Form Submission triggers an action when a user submits a form on your Webflow site.
- Select the Webflow project and the specific form to watch.
- Click "Test trigger" to check that Zapier picks up the form data.
Step 3, add an action in Zapier
- Once the trigger is set up, move on to the next step by adding an action.
- Choose a target app, such as:
- Google Sheets, to automatically save form data in a spreadsheet.
- Slack, to send real-time notifications to your team.
- Mailchimp, to automatically add users to a subscriber list.
- Set up the fields to define how the data is transferred. For example, map the Webflow form fields to Google Sheets columns.
- Test the action to check that the data comes through.
- Turn on your Zap so it runs in the background.
Zapier also offers many templates that make automating certain tasks even easier.
Examples of popular automated workflows
Zapier adapts to a wide range of business needs. Here are the main automated workflows, the Zaps, you can use on your Webflow site:
- Sending leads to Google Sheets
Zapier automatically sends Webflow form data to a Google Sheets spreadsheet. Lead tracking is simpler and your teams work together better. - Real-time notifications in Slack
Set up a Slack notification that alerts your sales team as soon as a form is submitted. - Adding subscribers to a Mailchimp list
Automatically sign up for your newsletter the users who fill out a form on your Webflow site. - Creating an entry in the Webflow CMS
Automatically import dynamic content into the Webflow CMS from data collected by a form or another source.
Tips to optimize your Zaps
- Use filters
Add conditions so an action runs only when certain criteria are met, such as the type of user response. - Avoid overload
Keep your workflows simple to limit errors and track your data easily. - Test your Zaps regularly
Check often that your automations work as expected, especially after an update to your tools. - Use the advanced features
"Multi-step Zaps" let you build more complex workflows. You can also add delays to spread out when actions are triggered. - Watch your task quota
Zapier plans include a limited number of tasks per month. Track your usage to avoid interruptions.
Want to go further with your Webflow site? Check out our top 10 best Webflow apps in 2025.
Conclusion
Integrating Zapier with Webflow lets you automate your workflows and make your site more efficient. Lead management, CMS updates or real-time notifications, the integration adapts to your needs. With this guide, you have the steps to get the most out of the 2 tools and give your users a smooth experience.